
To connect your Wealth99 account to Koinly, there are two options: Via API or Via CSV. To understand more about the difference between both, please check here.
Via API
Part 1: Add your Wealth99 wallet on Koinly.
1. Create an account on Koinly.
2. Go to 'Wallets' on the superior menu and click 'Add wallet / Exchange'.

3. On the search box type in 'Wealth99', and click over to select it.

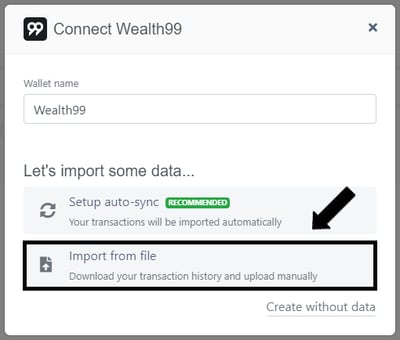
4. A new window will open, click 'Set up auto-sync'.
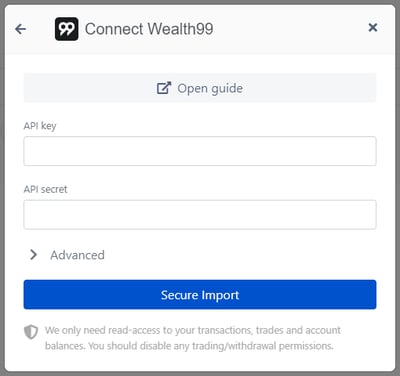
5. The API Key and API Secret will be required. Please follow part 2 in order to create the API Key and API Secret that will be inserted here.
Part 2: Create an API Key and Secret at Wealth99.
1. Log in to your Wealth99 account.
2. Go to 'Account' on the left side menu and select the 'Financial' tab.
3. Navigate to 'Integrations' and click 'Create API Key'.

4. Insert 'Koinly' as the API Key name and click 'Continue'.
5. The Google Authenticator code will be required. Insert the six-digit code from the authenticator app to proceed (If the 2FA wasn't activated through Google authenticator, you'll receive a six-digit code via SMS).
6. Copy the provided API Key and Secret. Save these credentials in a safe place.

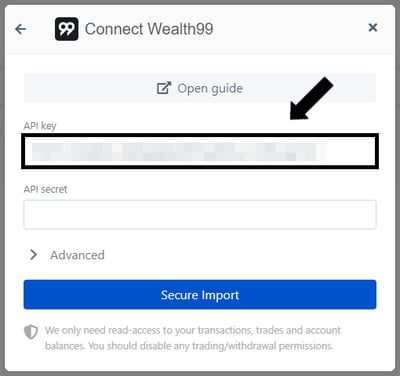
7. Go to Koinly and paste the copied API Key and Secret in the respective fields.
8. Once the API Key and Secret have been inserted at Koinly, click 'Secure Import'.
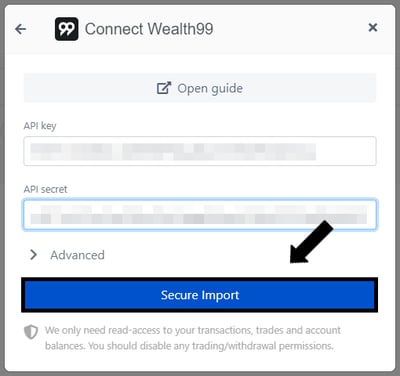
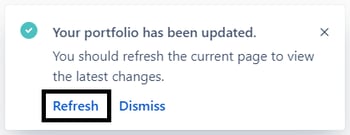
9. The transactions will start syncing. Once finished, click on 'Refresh' to reload the latest changes.
Via CSV
Part 1: Download your transaction history report from Wealth99.
1. Log in to your Wealth99 account.
2. Click on 'History' on the left side menu and select the 'All Transactions' tab.
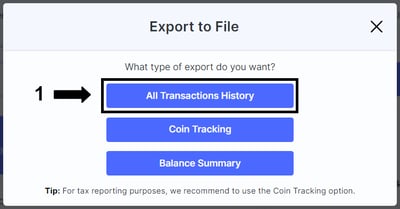
3. Click 'Export'.

4. Select 'All Transactions History'.
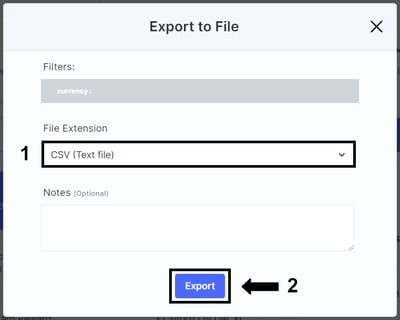
5. From the drop-down menu under file extension, select 'CSV' and click 'Export'.
6. Save the CSV file on your computer.
Part 2: Upload the CSV file on Koinly.
1. Create an account on Koinly.
2. Go to "Wallets" on the superior menu and click "Add wallet / Exchange".
3. On the search box type in "Wealth99", and click over to select it.
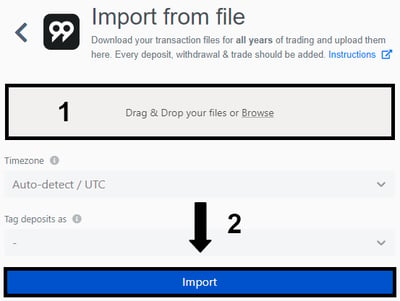
4. A new window will open, click "Import from file".
5. Drag, drop, or browse your downloaded Wealth99 CSV file on the specified box, and click "Import".
6. You will get a confirmation stating Import Complete.
Important
Note that if you have a long list of transactions in your Wealth99 account, it might take a few minutes to import all the data into Koinly.
Disclaimer: Koinly is not a Wealth99 service. If you decide to use Koinly, you are responsible for reviewing the third party’s service terms, website terms, and privacy policies. You agree that third parties, and not Wealth99, are responsible for the performance of Koinly and the content on their website. Links to third-party websites will open new browser windows. Except where noted, Wealth99 accepts no responsibility for content on third-party websites.